Saturday 31 December 2011

Card Calendar – using a scarf


During the week, I popped into a cheap store and saw a reduced scarf; I loved the look of the fabric and that is where my idea originated from.
Later that day I also saw a small calendar chart and thought that would also work well for a later project.
When I got home I started designing a card using the scarfs fabric, choosing matching papers and accessories that I already had in my stash. The end of the scarf worked great to add texture and movement to the background. I also tied a large bow with the fabric and cut a small section off to create a smaller bow. I coloured in a Lily of the Valley Stamped image with Promarkers, to match my colour scheme. My sentiment was also a stamped image but from a FREE stamp set that came with the 100th issue of Cardmaking Magazine, which was also one of this week’s crafty purchases.
My Lily of the Valley card was really coming along, but I decided to turn this thank you card into a calendar beings as it is nearly the New Year and after all it was being created for someone special, as a big thank you for everything they have done and given me, so I thought I would give something a little bit different and a small gift back for their love and generosity.

Craft items used:
½ x Scarf
1 x Bronze Teddy Charm
1 x Bronze Jump Ring
1 Small Calendar Chart
1 x Doily
5 x Paper Flowers
5 x Card Candi
1 x Sheet of 8x8 Desert Blossom pack [Double sided]
1 x Sheet of White A4 Card [Used to stamp onto and cut dies]
1 x Kanban Decorative Card and Envelope

Craft Tools used:
Scissors
Eyelet Nestibilities Die
Sizzix Circles and Triangles Border Dies
Promarkers
Thank you Stamp
LOTV Fairy Stamp
Silicone glue
Double sided tape
Stazon Black Ink Pad


Entered for
Scarf, Calendar, Doily bought 28th December 2011
Thank you sentiment Stamp January 2012 issue 100
LOTV Stamp, Shaped Card bought December 2011
Scarf, Calendar, Doily bought 28th December 2011
Thank you sentiment Stamp January 2012 issue 100
LOTV Stamp, Shaped Card bought December 2011
New Calendar for the New Year
Not using paper pretties images


Sunday 18 December 2011

Creating Matching Papers and Embellishments


If you cant find any papers or embellishments, you like or to match your product why not create your own?


What you will need:
-White card
-Stamp of your choice [Flower, by Martha Stewart]
-Clear ink pad [Martha Stewart Create]
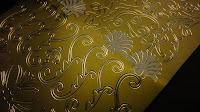
-Embossing powder [Gold, Martha Stewart]
-Heat gun
-Ink blending tool and Foam
-Distress Ink [Tim holts, Chipped Sapphire]


Paper:
STEP 1: Ink up your stamp and print it onto your card.
STEP 2: Cover over the stamped area with your chosen embossing powder.
STEP 3: Tap off the excess powder, poor back into the pot/jar.
STEP 4: Heat over the stamped, embossed area and it will start to heat up and change colour.
STEP 5: Repeat the first 4 steps until your card is covered.
STEP 6: Once you have covered the paper, dab your Ink blending tool into your chosen distress ink and rub it over the surface of your stamped embossed images. If the ink sticks to your embossed images, which it shouldnt, just wipe over with a dry cloth. If you would like the colour darkened just keep going over until you get the shade you would like.
Your backing paper should be complete.


1 Embellishment:
STEP 1: Ink up your stamp and print it onto your card.
STEP 2: Cover over the stamped area with your chosen embossing powder.
STEP 3: Tap off the excess powder, poor back into the pot/jar.
STEP 4: Heat over the stamped, embossed area and it will start to heat up and change colour.
Step 5: Dab your Ink blending tool into your chosen distress ink and rub it over the surface of your stamped embossed image.
STEP 6: Turn over and add distress ink to the back of the embellishment to match.
STEP 7: Cut around your image, curve the edges.
Step 8: Repeat this if you are creating layered embellishments as shown in the picture.
Step 9: Stick the two embellishments on top of each other with your chosen glue or tape.
Step 10: Finish it off with some added extras I had chosen some rhinestone gems.


Other products used on this card:
-Create and Craft Tape Pen
-Double sided tape
-Art Deco Christmas Decoupage
-Gold matt/mirror card
-Nellies Multi Frames [circular] for Die cutting machine
-Gold Best wishes peel off
Machines: Bigshot and Guillotine


Friday 16 December 2011

Have a Sweet Christmas


I thought this would be a sweet idea for a card and keeping the same style yet changing the colours, papers and type of sweets it could be used for virtually any occasion. It doesnt even have to be sweets/candy in the jars: how about something different like fairies or aliens to suit your occasion and gender needs.
I went for candy canes for a touch of Christmas and some mixed sweet jars to compliment the canes.


Items used:
Stamps Sweet Jar and greeting outline, the Candy Shop collection by Creative Expressions
Candy Cane and Sweet stamps, the Whimsy Stamp, See-D Stamps
Inks   - Me to you, Blue nose Ink Pad
- Craft Creations, Red Ink Pad
- Light Green Ink Pad
- Stazon, Black Ink Pad
Products Acetate
-    Brown wood paper [shelf]
-    Flower paper, DCWV adhesive paper prints pack
-    Stripy paper, Dovecraft, sugar and spice paper pack
-    A5 White card and Envelope
-    Message/Greeting computer printout.


Saturday 10 December 2011

Peel Off ~ Backing Paper


Do you ever have left over peel offs and dont know how to use them?
Do you ever run out of your favourite papers or cant find any to coordinate?
Do you just want to try something a little different?
Then this is for you!
I always have left over peel offs especially if I purchase peel offs in packs, there are always some that I would never use. These can come in great use when in need of a background paper especially to match mirror card.
I needed to create a book card but didnt have any papers to go with it, so I added gold corner peel offs to some plain white card, [as I always have a nice stock of that!] This made a brilliant matching backing paper with a professional look. There still seemed to be something missing though, so I added some border peel offs around the outside of the page to complete the look. The bookmark down the centre of the card was scrap left over from the outside page, so no wastage!
I now had a card base but needed to add some content, the Dufex decoupage matched perfectly and a message was all the card needed.
This card was created using:
The Glitter Girls-Bookatrix Board,
1x Gold A4 Mirror Card,
2x White A4 Card,
1x Sheet of Dufex Decoupage,
1x Sheet of gold corner peel offs,
1x Sheet of gold border peel offs,
1x Printed birthday message,
Adhesives Foam Pads, Double sided tape
Tools Scissors, 6mm Embossing Tool